


When you finish redecorating a room, sometimes it still feels like something is missing. The walls are freshly painted, the flooring is pristine and the lighting is perfect – yet the room lacks that polished, finished look. The secret ingredient? Coving.
Coving, also known as cornice, is the trim that softens the sharp join between wall and ceiling. It adds elegance, depth and cohesion to any room. But many homeowners avoid installing coving because they assume it’s difficult, messy or expensive. The good news is that with lightweight polyurethane coving from Supercove, you can achieve a professional finish with simple tools, minimal effort and no specialist skills.
This step-by-step guide shows you exactly how to install lightweight coving yourself, explains why polyurethane is the smarter choice over plaster or polystyrene and shares practical tips to help you avoid common mistakes.
Why Choose Lightweight Polyurethane Coving?
- Versus plaster: Plaster is authentic and traditional but heavy, messy to work with and usually requires skilled tradespeople. It’s also far more expensive.
- Versus polystyrene: Polystyrene is cheap and easy to find but flimsy, prone to dents and delivers a poorer-quality finish once painted.
Polyurethane coving (Supercove) offers the best of both: it’s lightweight to handle, strong and impact-resistant, delivers crisp plaster-like detail, is moisture-resistant for kitchens and bathrooms and installs cleanly with adhesive. It’s UK manufactured, supporting local jobs and reducing transport miles.
Tools and Materials You’ll Need
Installing Supercove lightweight coving is a straightforward DIY job – provided you have the right tools and materials to hand.
- Supercove lightweight polyurethane coving (order enough to cover the room perimeter, plus 10% for cuts and waste)
- Coving adhesive (grab adhesive or the product recommended by Supercove)
- Fine-tooth saw (a hacksaw or panel saw works well)
- Mitre box (for accurate 45° angle cuts)
- Tape measure and pencil
- Spirit level or chalk line
- Caulk or filler (for joints and tiny gaps)
- Fine-grit sandpaper
- Paint and brush/roller (to finish once installed)
Pro tip: Lay everything out before you start – it saves time and helps prevent mistakes.
Preparing Your Space for Installation
- Clear and protect: Move furniture away from walls and cover floors with dust sheets.
- Clean surfaces: Ensure the wall–ceiling area is free from dust, grease and flaking paint so adhesive bonds properly.
- Mark a guideline: Using a spirit level or chalk line, mark where the bottom edge of your coving will sit for a consistent height around the room.
- Plan joints and starting point: Start on the most visible wall; aim to keep smaller offcuts in less noticeable areas.
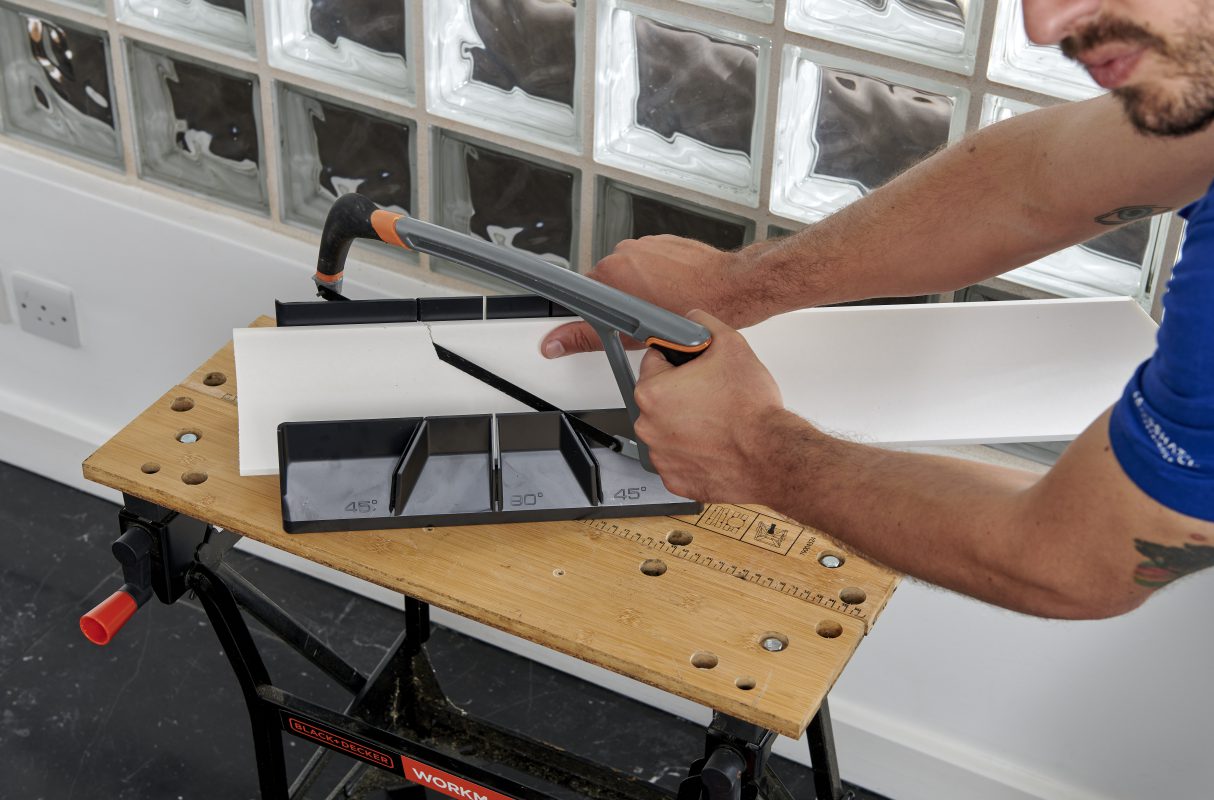
Cutting Lightweight Coving – Getting the Angles Right
The trickiest part for many DIYers is cutting neat mitres. With lightweight polyurethane, it’s easier than you think.
- Use a mitre box: It guides perfect 45° cuts for internal and external corners.
- Measure twice, cut once: Double-check lengths before sawing to minimise waste.
- Hold the profile correctly: Place the coving in the mitre box in the same orientation it will sit on the wall/ceiling.
- Practice on an offcut: A quick test cut builds confidence and helps dial in your technique.
Unlike polystyrene, polyurethane cuts cleanly without crumbling, and it’s far easier to handle than plaster.

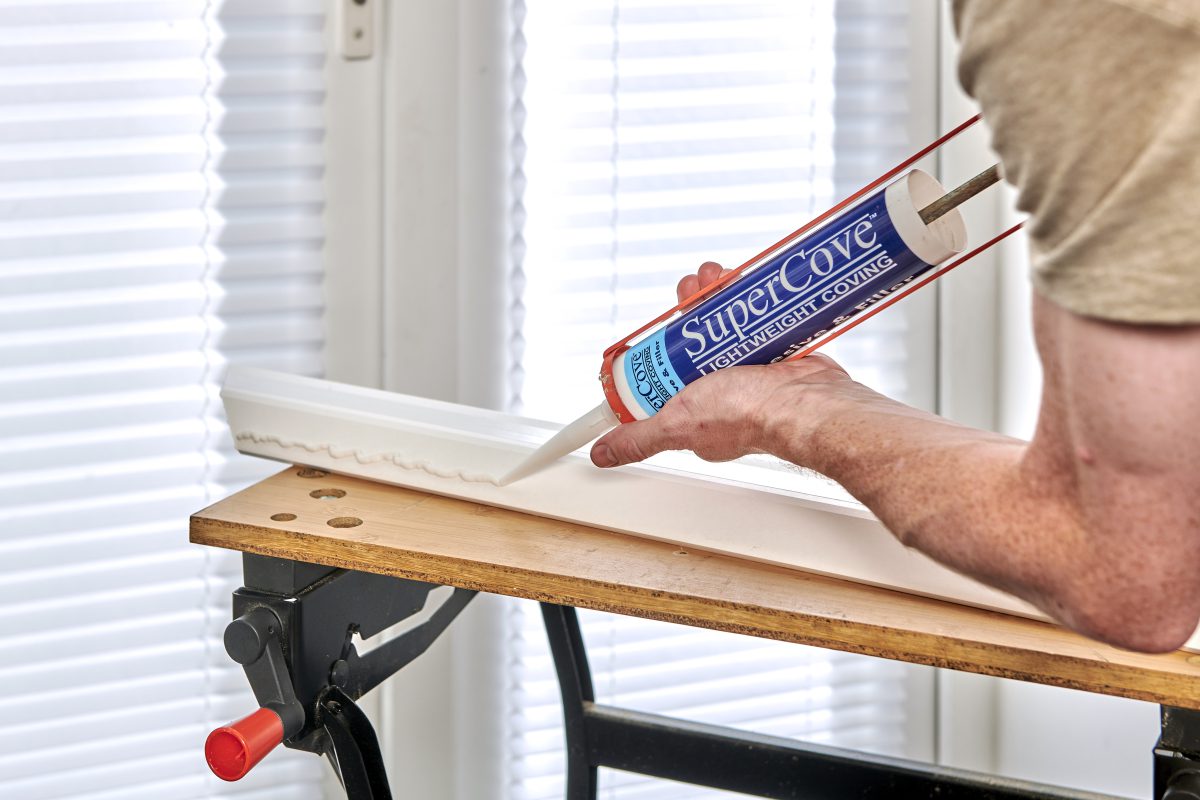
Fixing the Coving in Place
- Dry-fit first: Offer each cut length up to the wall to check the fit before gluing.
- Apply adhesive: Run a generous bead along the top and bottom edges on the back of the coving. Add a little extra at mitred ends.
- Position accurately: Press the coving firmly along your guideline, starting at a corner and working along the wall.
- Support as needed: For long runs, a helper can hold the other end while the adhesive grabs.
- Clean excess: Wipe away any squeeze-out with a damp sponge or cloth for a tidy edge.
No nails, screws or wet plastering required – just a clean, controlled adhesive bond with a professional result.
Finishing Touches for a Professional Look
- Fill joints and hairline gaps: Use decorator’s caulk or fine filler at mitres and along the top/bottom edges.
- Lightly sand: Once dry, smooth any filler ridges with fine sandpaper.
- Paint to finish: Most people paint coving to match the ceiling for a seamless look; contrast colours can create a stylish feature.
Tip: Let adhesive and filler fully cure before painting for the smoothest possible finish.
Common Mistakes to Avoid
- Skipping prep: Dusty, greasy or flaky surfaces weaken the bond.
- Wrong adhesive: Use a quality coving/grab adhesive, not generic glue.
- Sloppy measurements: Misjudged mitres lead to gaps and wasted material.
- Over-relying on filler: Neat cuts are the real secret – filler should be minimal.
- Rushing the paint: Paint only when everything is fully cured and lightly sanded.
Why DIYers Love Supercove
Lightweight polyurethane coving has transformed how homeowners approach DIY decorating. Supercove is the brand of choice across the UK thanks to:
- Ease of use: Many DIYers complete a full room in just a few hours.
- Professional finish: Crisp profiles and sharp detail rival plaster without the hassle.
- Durability: Resists knocks, cracks and humidity for long-term performance.
- UK-made quality: Consistent standards, local support and reduced transport miles.
Real-world note: First-time installers often report friends assume a professional fitted their Supercove coving – proof that technique plus the right material delivers outstanding results.
Quick Installation Checklist
- Measure the room perimeter and order coving +10% for waste.
- Mark a level guideline around the room.
- Cut mitres using a mitre box; dry-fit each length.
- Apply adhesive top and bottom; add a dab at ends.
- Press into place along the guideline and wipe excess.
- Fill, sand lightly and paint after curing.
FAQs
Do I need a tradesperson to install lightweight coving?
No. Supercove polyurethane coving is designed for DIY installation with simple tools.
Can I use lightweight coving in bathrooms and kitchens?
Yes. Polyurethane is moisture-resistant and ideal for humid rooms.
What colour should I paint my coving?
Most people match the ceiling for a seamless look, but contrasting colours can create a striking feature in contemporary spaces.
How do I choose the right profile size?
Taller ceilings often suit deeper profiles for better proportion; smaller rooms typically look best with slimmer designs.
Conclusion: Transform Your Room with Ease
Installing coving no longer needs to be a daunting task reserved for professionals. With lightweight polyurethane coving from Supercove, anyone can achieve a crisp, elegant finish quickly, cleanly and affordably.
In summary: polyurethane is stronger and better looking than polystyrene, yet far easier to work with than plaster. With the right tools and simple preparation, installation is straightforward – and the result instantly elevates your interior.
Ready to finish your room properly? Explore Supercove’s UK-made range of lightweight coving profiles and see how simple it is to transform your space this weekend.